Manuel Guilbault's Blog
Hosting an Aurelia app on Azure
In this serie:
- Hosting an Aurelia app on Azure (this post)
- Deploying an Aurelia app on Azure using VSTS
- Adding deep linking support to an Azure Functions-based Aurelia app
- Adding Let’s Encrypt to an Azure Functions-based Aurelia app (coming soon)
When it comes to hosting a static website on Azure, there are multiple possibilities, each with their own advantages and limitations.
One of those possibilities is to host the static files as a Web Application. However, this can be a pretty expensive solution, as the cheapest pricing tier supporting custom domains is a little more than 8 euros per month. Even more, if you want to support SSL, it bumps up to nearly 50 euros.
In this blog post, I’m going to show how to host an Aurelia application (or any static site, actually) on Azure for *almost* nothing. We’ll host the application’s files on a Blob storage container, then use an Azure Proxy Function, which will act as an entry point and work around some limitations of Blob storage.
For sites than have less than a million visits per month, this setup will likely cost less than a couple of euros per month. This is because Blob storage is really cheap, and Azure Functions, when using the consumption plan, come with a million of free executions per month.
You can use this sample Aurelia application if you want to follow along.
To follow this post, you’ll need an Azure subscription.
Storing files on a Blob storage container
We’ll start by creating a Blob storage container and upload a simple Aurelia application to it.
Creating the storage account
Start by navigating to your Azure portal.
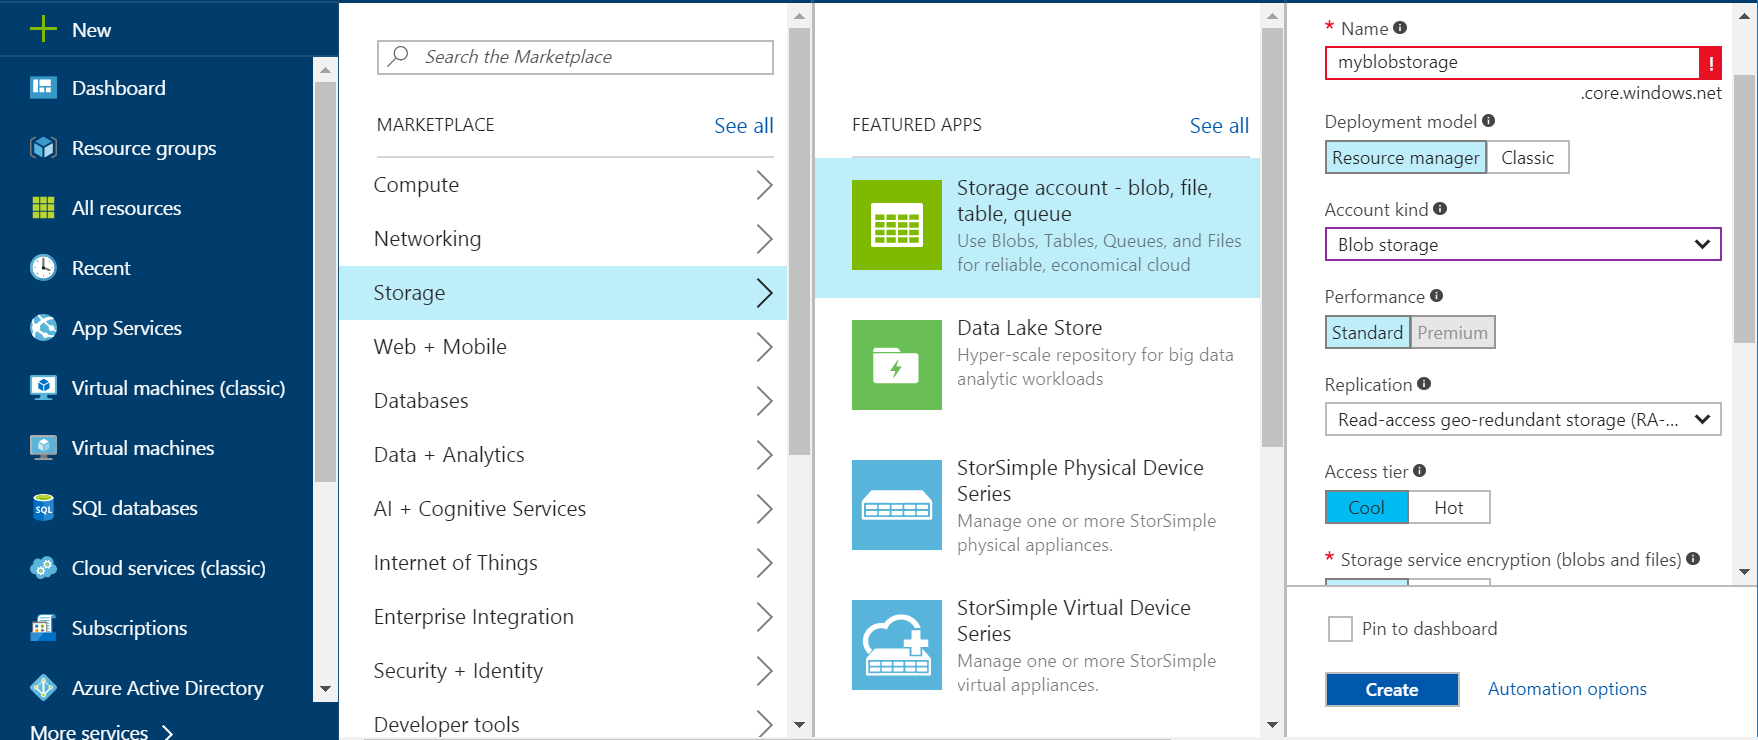
Go to New > Storage > Storage account. A storage account creation form will show. Fill the following properties:
- Name: the name of your Blob storage account (I used
manuelguilbaulthere). Must be globaly unique, as it will be used in the Blob storage’s domain name. - Subscription: select your Azure subscription.
- Resource group: every Azure artefact must belong to a given resource group. Either select an existing resource group or create one.
- All other properties can keep their default values.
You can next click on Create.
Azure is going to work for a little while. Once your Blob storage account has been created, navigate to it (you can either search for it in the top search bar, or simply click on the success notification). You’ll see the following:
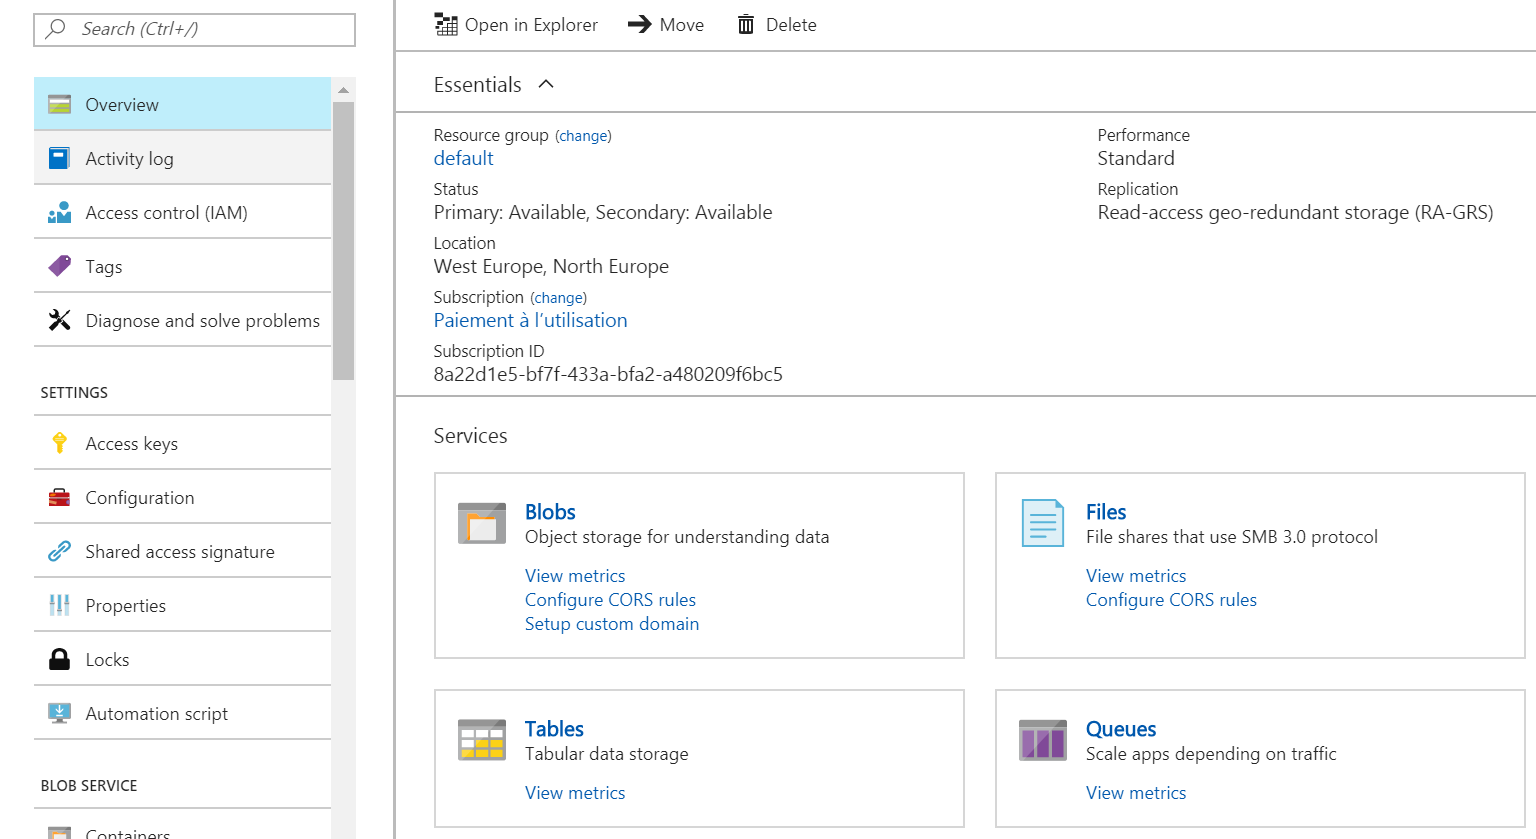
Under Services, click on Blobs, then on the button to add a Container:
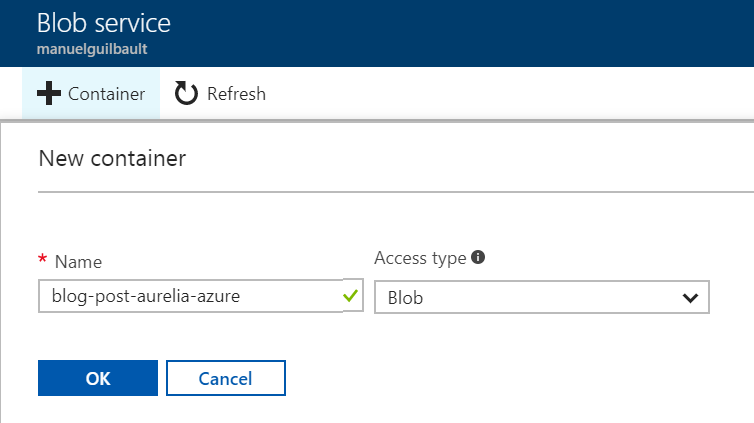
Give the container the name you want (I named mine blog-post-aurelia-azure) and select Blob as the access type,
so the data stored in the container is publicly visible on the web, then click OK. Your new Blob container
will be created.
Uploading the app
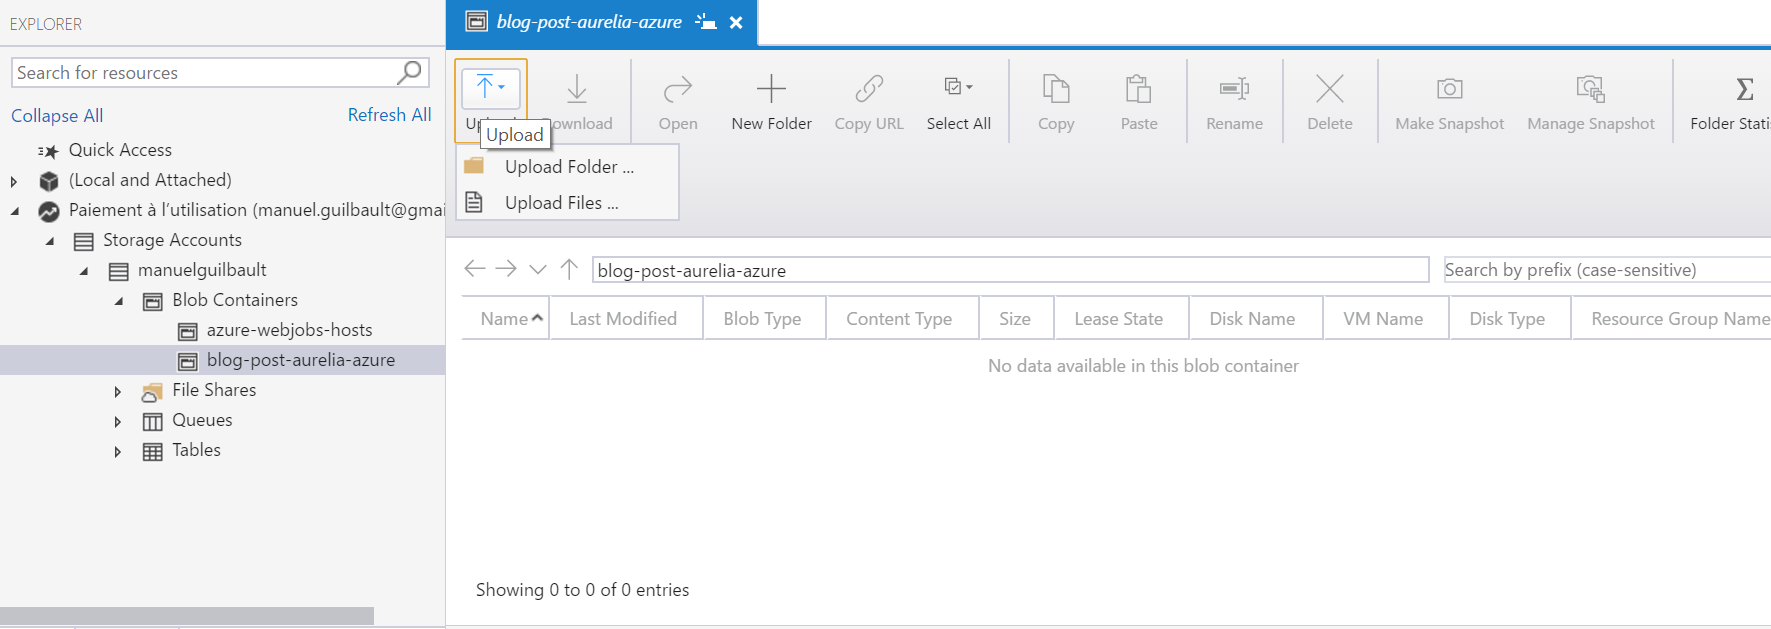
For the next steps, you’ll need the Azure Storage Explorer installed.
Scroll left so you see your storage account, and click on the Open in Explorer button. This will launch the Azure
Storage Explorer. Follow the instructions and sign in, so you see your subscription(s) in the explorer’s left panel.
In this left panel, expand your subscription, then your storage account and its Blob Containers and select your new container. Then, in the container’s tab in the center panel, use the Upload button to upload the files and folders of your Aurelia application.
If you upload the sample app provided at the beginning of this post, first make sure you au build it before hand
(see its README.md file), then upload the scripts folder, and the favicon.ico and index.html files.
Accessing the files
Once the app is uploaded to Azure, let’s try to access the files from a browser. Go back to your storage
account on the Azure portal and copy it’s Primary blob service endpoint, which is a URL following this pattern:
https://<your_storage_account_name>.blob.core.windows.net/. In my case, the URL is
https://manuelguilbault.blob.core.windows.net/.
To this URL, append the name of the Blob container, followed by /index.html (or the name of your application’s index file). In my case, the final URL looks like this: https://manuelguilbault.blob.core.windows.net/blog-post-aurelia-azure/index.html.
If you access this URL in a browser, the index.html page should load (check your browser’s developer tools to make sure).
Now, if you used the sample Aurelia application provided at the beginning of this post, or if your own Aurelia app uses the
router with push state, your app shouldn’t work when you navigate to this URL. This is because Aurelia expects that the
application is loaded using a default document (without the index.html part), so the router can correctly match the
/ path to its home route.
Using Azure Proxy Functions
Accessing an Aurelia application directly from the Blob storage URL has some severe limitations:
- Blob storage doesn’t support default documents. This means that accessing a directory path (in my case,
https://manuelguilbault.blob.core.windows.net/blog-post-aurelia-azure/) doesn’t serve theindex.htmlfile in the directory, but will return a 404 Not Found response. - If your Aurelia application uses the router in push state mode, your app won’t work because the router expects
the app to load using the default document (
/).
To solve these issues, we’ll create an Azure Function app on top of the Blob storage container, that will act as a proxy for our application.
Creating an Azure Function Application
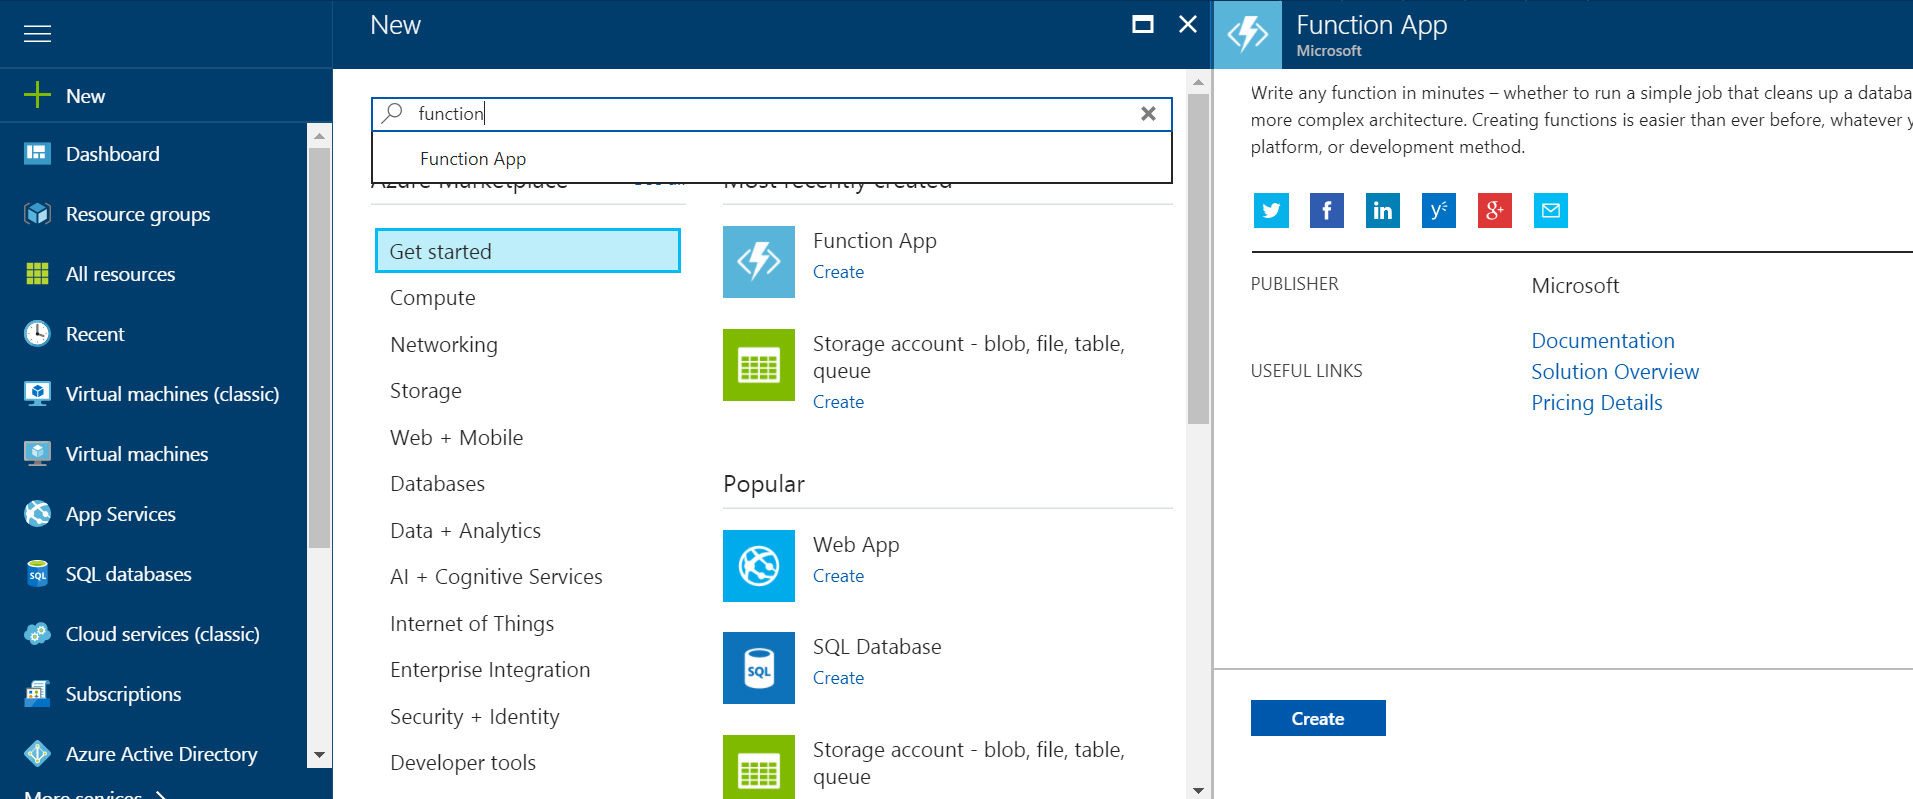
In the Azure dashboard, click on New, search for function, click on Function App, then on Create. Next,
fill the form:
- App name: enter the name of your Function app (I named mine
manuelguilbault-blog-post-aurelia-azure). Must be globaly unique, as it will be used in the app’s domain name. - Subscription: select your Azure subscription.
- Resource Group: every Azure artefact must belong to a given resource group. Either select an existing resource group or create one.
- Hosting Plan: select
Consumption Planto get 1 million free executions per month (at the moment of writing). - All other properties can keep their default values.
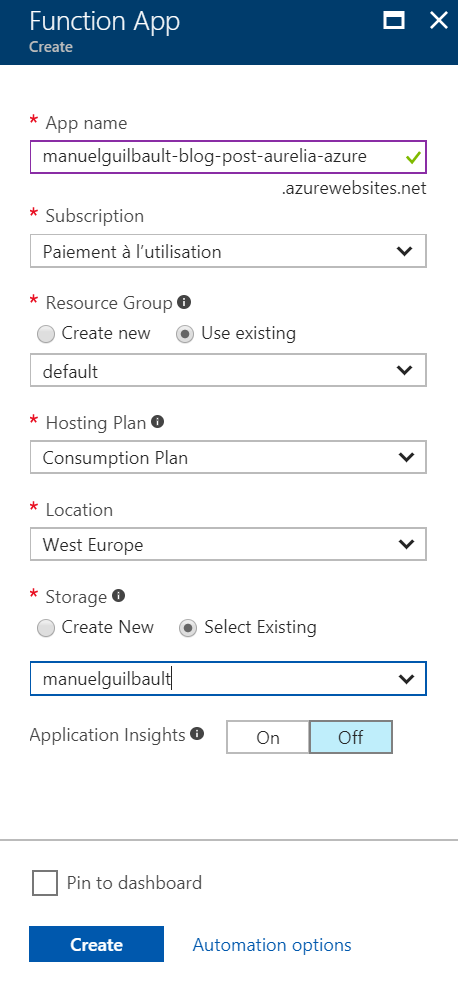
You can next click on Create.
Enabling Proxy Functions
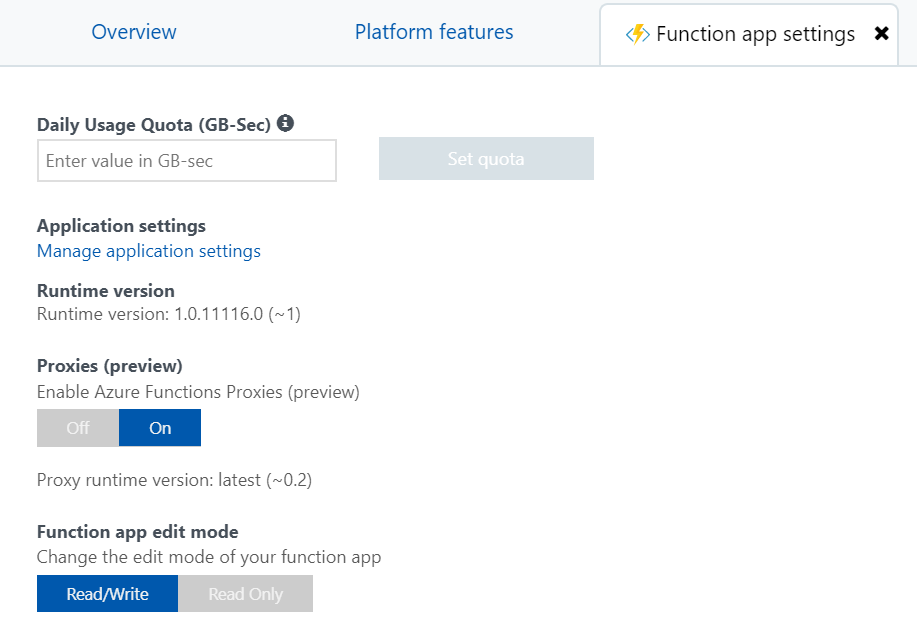
At the moment of writing, the Azure Proxy Functions feature is in preview. As such, it must be enabled before it can be used.
To do so, navigate to your new Function App in the Azure portal. In the Overview tab, under Configured features,
click on Function app settings. This will open a new tab titled Function app settings, under which you can enable
Proxies by toggling the feature to On.
Creating an Azure Proxy Function
Navigate to your Function App in the Azure portal, and click on the plus button beside the Proxies list item.
This will display a creation form, which you can fill:
- Name: the name of the proxy function. I named mine
default. - Route template: the template of the URL path that must be matched for this proxy function to be triggered.
Here, enter
/{*path}. This pattern will match any path and make it available as apathvariable to the backend URL. - Backend URL: the URL to which matching requests will be dispatched. Here, enter the URL of your Blob storage
container, followed by the
{path}variable output. For me, this washttps://manuelguilbault.blob.core.windows.net/blog-post-aurelia-azure/{path}. - All other properties can keep their default values.
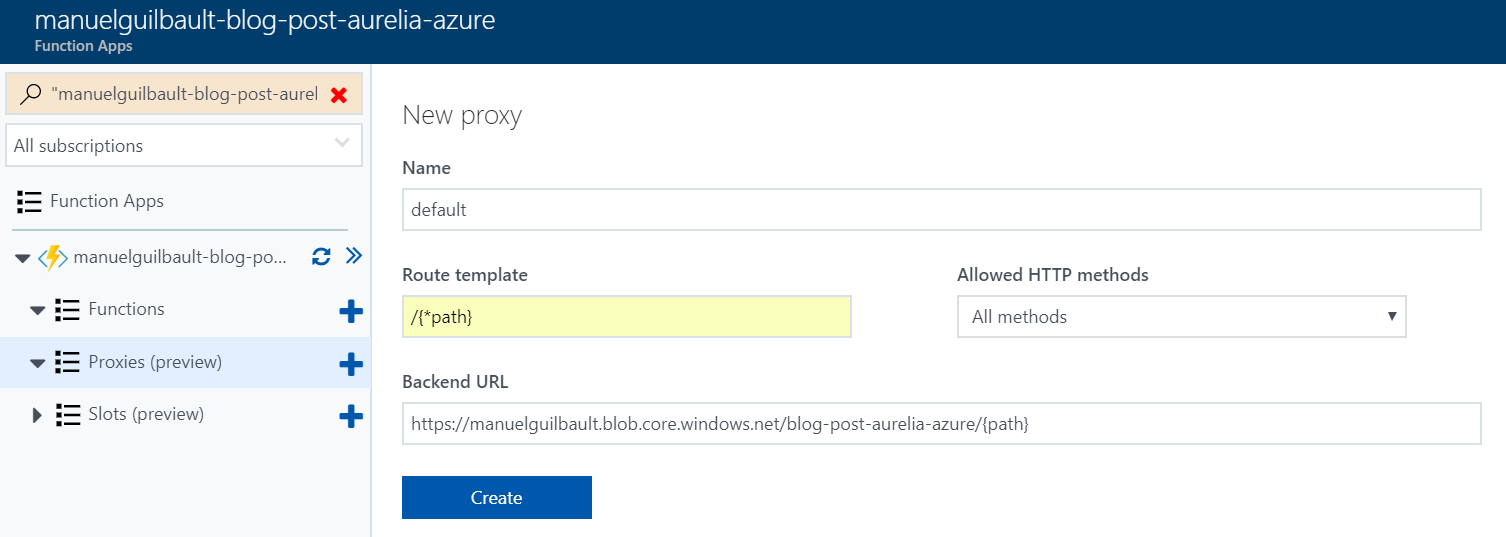
You can next click on Create.
This function will dispatch all requests sent to https://manuelguilbault-blog-post-aurelia-azure.azurewebsites.net/
to my Blob storage container. However, in order to support default documents, so the index.html file is loaded when
accessing the / path, we need to create a second proxy function with the following properties:
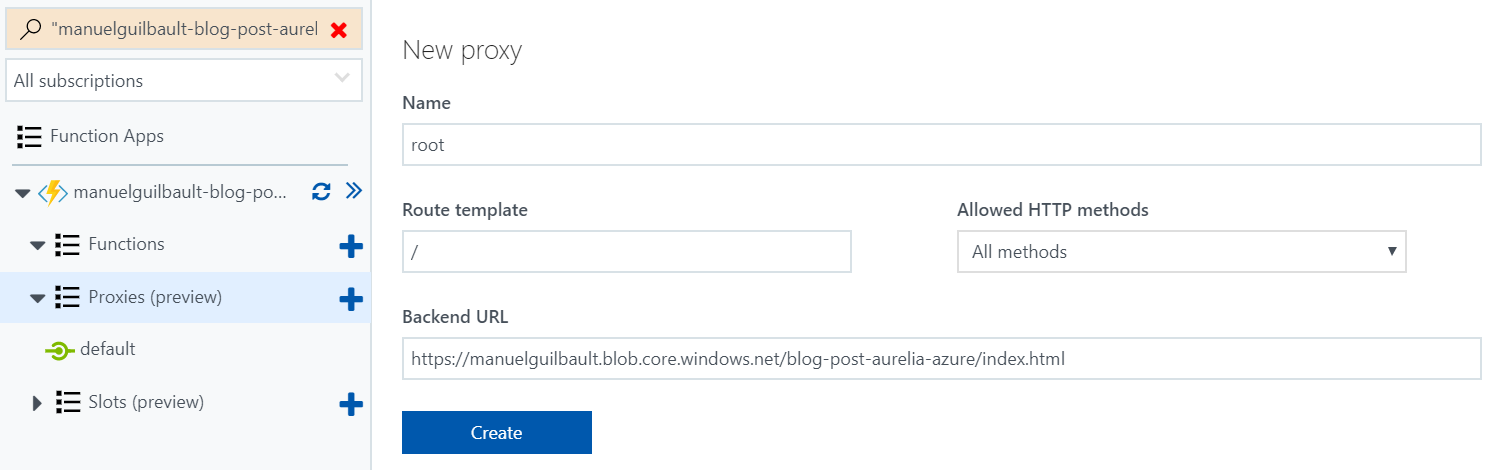
- Name: the name of the proxy function. I named this one
root. - Route template: this proxy function should match only requests sent to the root, so enter
/. - Backend URL: requests sent to the root should return the
index.htmlfile, so enter URL of your Blob storage container, followed byindex.html. For me, this washttps://manuelguilbault.blob.core.windows.net/blog-post-aurelia-azure/index.html.
Now click on Create.
Testing the application
We now have two proxy functions. The first one, named root, will be used to load the index.html when accessing
the root of our function app’s domain, and a second one named default which will
simply forward any other requests to the Blob storage container. The first one will be used to load our Aurelia
application itself, and the second one will kick in when the index.html file will load our application’s bundles,
CSS files or images.
To test the application, simply launch a browser tab and navigate to your function app’s URL
(in my case, https://manuelguilbault-blog-post-aurelia-azure.azurewebsites.net/). The Aurelia app (or your
static site) should load properly now.
Making the Blob storage container private
Since the Blob storage container is no more accessed directly, but only through a Proxy Function, you can make it private to make sure no one can access it directly from the web.
To do this, go back to your Blob storage container in your Azure portal, then click on Access policy. You should see
this form come up:

Here, simply change the Public access level to Private and click Save.
Wrapping things up
With two very simple proxy functions and a Blob storage container, we now have an Aurelia app (or a static site) hosted on Azure, for a very cheap price. Additionally, since our application is accessed through a function app, we can easily add a custom domain and an SSL certificate to our app.
In my next post, I show how to use Visual Studio Team Services to automate the build and deployment of an Aurelia application to a Blob storage container. Stay tuned!
Written on August 22nd , 2017 by Manuel GuilbaultThanks to @NatMarchand for the idea!
Comments
comments powered by Disqus